23 March 2014

Sour Cherry Amaretti Squares


Say hello to my *new and improved* Sour Cherry Bars aka Sour Cherry Amaretti Squares - if you are a big fan of anything remotely cherry bakewell-ish then you are going to LOVE these!

Every nibble is crammed full of juicy sour cherries, white chocolate chunks and a handful of flaked almonds for good measure.  These are the perfect accompaniment to your mid-morning coffee or as a little indulgence at any time of the time of the day.


Ingredients: (makes 16 squares)

100g digestive biscuits
100g amaretti biscuits
120g sour cherries (I use Forrest Feast from Waitrose)
100g white chocolate, chopped
40g unsalted butter
90g condensed milk
handful of flaked almonds

1. Line a square 8 inch baking tin with baking parchment and put to one side.

2. Grind up the biscuits to a fine crumb in a food processor.  If you don't have a food processor just pop the biscuits into a thick resealable sandwich bag and beat with a rolling pin.

3. Add sour cherries and white chopped chocolate and mix briefly.

4. Over a medium heat, melt the butter and condensed milk for 3-4 minutes stirring continuously until combined.  Remove from heat and leave to cool slightly, you don't want it too warm otherwise it will melt the chopped chocolate.

5. Add the butter and condensed milk to the dry mix and fold in using a wooden spoon.

6. Pour into prepared tin and even out with the back of the spoon.

7. Sprinkle the flaked almonds on top and gently press down into the mix.  Refrigerate for 2 hours.

8. Once the 2 hours is up, remove from the fridge and cut up into 16 squares.

Happy (no)baking!


16 March 2014

Mocha Orange Cake


What's better than a chocolate orange cake?  A mocha orange cake of course!

Super moist, rich and chocolatey with an orangey twang and a subtle kick of espresso marks this cake pretty high up in the BakeAbella cake charts.  In fact, the amount of amazing feedback I have had regarding this cake has been utterly crazy!  Even the remains of the ganache failed to survive longer than a few hours - hey mum ;)

There are no doubts that this cake will be gracing my friends and family's mouths again rather soon.  It is honestly way too delicious to be a one off.


Ingredients

For the cake:
200g unsalted butter
25g cocoa powder
200g dark chocolate, broken into small pieces
3 tbsp instant coffee dissolved in 1 tbsp of boiling water
180g light brown muscovado sugar
180g caster sugar
3 eggs
3tbsp single cream
1 orange, zest and juice
180g self raising flour

For the ganache:
1 orange
200g dark chocolate, broken into small pieces
200ml double cream
2 tbsp instant coffee dissolved in 1 tbsp boiling water

For the buttercream:
275g icing sugar
230g unsalted butter, softened
2 orange, zest and 2 tbsp juice
1 1/2 tsp orange blossom water

For decoration:
Orange peel
45g caster sugar
1 tbsp orange juice

Making the cake:
1.  Preheat oven to 180C/160C for fan assisted ovens.  Grease and line 3 x 8 inch sandwich tins.
2. Put the butter, chocolate, cocoa and the dissolved coffee into a bowl and set over a pan of simmering water, stirring occasionally until melted.  
3. Remove from the heat and add in the sugars, mix until well combined.
4. In a separate bowl, combine the eggs, cream, orange zest and juice and then add to the chocolate mixture.
5. Fold in the flour along with a pinch of salt, then divide into the 3 tins.
6. Bake for 25-30 minutes or until firm to touch. 
7. Remove from the oven and leave to cool on a wire rack 10 minutes.  Remove from tins and peel off parchment.


Making the ganache:
1. Using a vegetable peeler, pare long ribbons of zest from the orange and leave to one side.
2. Squeeze the juice from the orange into a bowl alongside the chocolate, cream, dissolved coffee and a pinch of salt.
3. Set the bowl over a pan of water on a low-medium heat until melted, then leave to chill in the fridge for about hour or until it is thick enough to spread.

Making the buttercream:
Simply beat all the ingredient together until pale, light and fluffy!

Make the decoration:
1. Put the sugar and orange juice into a heavy-based saucepan.
2. Add the pared peel and simmer for 10-15 minutes until the peel starts to caramelise.  
3. Remove from the pan and leave to set on a sheet of baking parchment.

To assemble:
1. With a sharp knife, take off the top of each layer of sponge.
2. Add a generous amount of buttercream to the first layer and sandwich another sponge on top.  Repeat with the remaining buttercream and sponge.
3. Cover the whole cake with ganache and then decorate with the caramelised peel.
4. Pop in the fridge and leave to chill before cutting.

Please have a go at baking this, you will not be disappointed!


12 March 2014

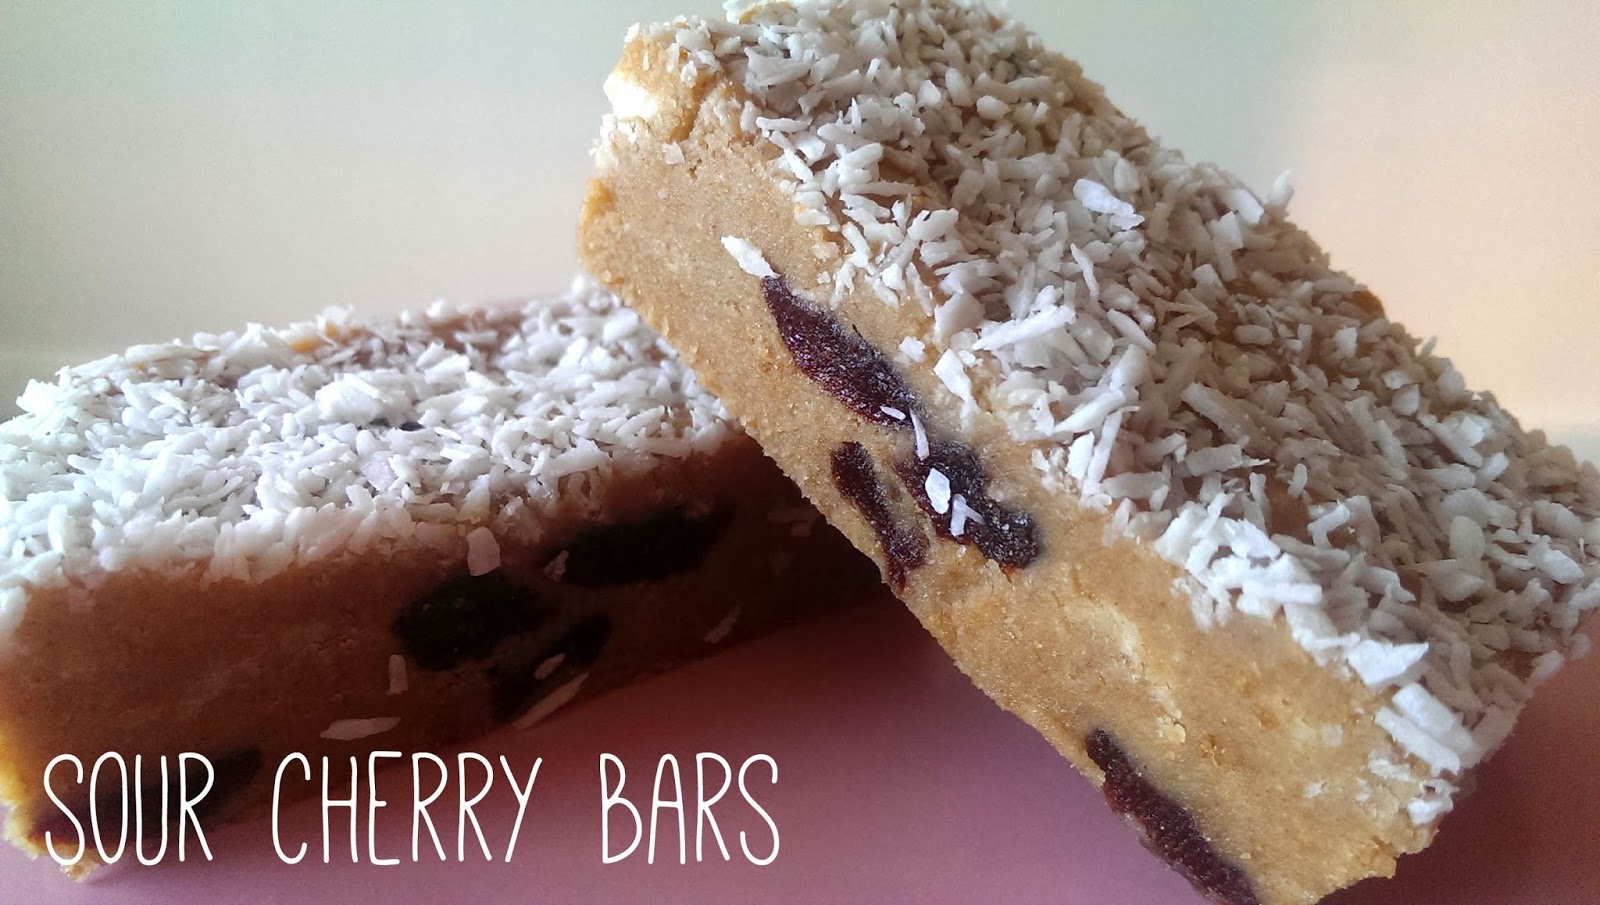
Sour Cherry Bars


On Sunday I decided to use up some leftover ingredients and create these Sour Cherry Bars. The recipe is similar to that of my Lemon Coconut Squares, but they only have coconut on the top not in the bars themselves so they are a lot more fudge-like and dense in texture.  Don't get me wrong, they taste delicious!  They just aren't quite the flavour I was aiming for, therefore I am going to be tweaking the current recipe this week until I get it spot on.

So why am I posting?  I thought it would be nice for all you other keen bakers, or first time bakers, to see that sometimes recipes don't go to plan even for the best of us.  Creating the best bake can take many attempts, especially if you're a bit of perfectionist like I am.  Don't lose faith if things don't go right the first time round.  Remember;


Check back later on in the week to see my perfected recipe and if you haven't already, please like my Facebook page or follow me on Twitter and Instagram :)


5 March 2014

Lemon Coconut Squares

These are one of my personal favourite bakes EVER...well no-bakes actually.  These Lemon Coconut Squares require absolutely no baking.  None. They are so incredibly tasty you would not believe how super quick and easy they are to make.

With a fudge-like texture these delicious little squares are crammed full of coconut, fresh zesty lemon and some sneaky white chocolate chips.  You will be hooked after the very first bite and I wish you all the luck resisting a second (or third) helping!


All that was left after my lemon coconut square selfie!


Ingredients
Adapted from Butter Baking - makes 16 squares

100g digestive biscuits
100g ginger nut biscuits
1 cup of dessicated coconut plus extra for sprinkling
1 lemon rind, finely grated
80g white chocolate chunks
100g unsalted butter
1/2 cup sweetened condensed milk
pinch of salt

1.  Line a square 8 inch baking tin with baking parchment and put to one side.

2.  Grind up the biscuits to a fine crumb in a food processor.  If you don't have a food processor just pop the biscuits into a thick resealable sandwich bag and hit with a rolling pin.

3.  Add the dessicated coconut, lemon rind, white chocolate chunks, salt and mix.

4.  Over a medium heat, melt the butter and condensed milk for 3-4 minutes stirring continuously until combined.

5.  Leave to cool for a couple of minutes then fold into the dry mix using a wooden spoon.

6.  Pour into prepared tin and even out with the back of the spoon.

7.  Sprinkle dessicated coconut over the top and gently press down into mix and refrigerate for 2 hours.

8.  Once chilled, remove from the fridge, divide into 16 squares and enjoy!


26 February 2014

Skinny Raspberry & Chocolate Banana Muffins

Now I don't know about you, but I always find myself gazing longingly at those delicious looking blueberry-oozing muffins sitting behind the counter whilst on a coffee run at Costa.  Of course I unwillingly resist these 447 calorie, 21g fat little monsters each and every time, but the craving for moist fruit-packed bakes aren't all that easy to shake off.

I spent the last couple of days googling several "skinny" muffin recipes (there are a lot out there) and with a little bit of tweaking came up with these little beauties!

The slightly sour kick from the fresh raspberries evened out by the smooth rich dark chocolate teamed with banana makes for a flavoursome and incredibly moist muffin. Even better, these muffins only contain around 227 calories and just 4.1g of fat, so there's no need to ruin your diet or feel guilty about indulging in one of these!
Skinny Raspberry & Chocolate Banana Muffins: 
Adapted from Sally's Baking Addiction - makes 15 cupcake-size muffins

1 cup plain flour (I use Doves Farm gluten-free)
1 1/2 cup wholemeal plain flour (I use Duchy from Waitrose)
1tsp baking powder 
1/4tsp salt
1/2tsp ground cinnamon
1/4 cup honey
1/2 cup light brown sugar, loosely packed
1 cup mashed ripe banana (equal to 2 large bananas)
1/4 cup non-fat greek vanilla yogurt
1 large egg, beaten
3/4 cup almond milk
1/2 cup 90% dark chocolate, roughly chopped
1 cup fresh raspberries
1. Preheat oven to 160C and lightly grease a silicone cupcake pan.  Silicone works best.  Do not use cases as the muffins will stick.

2. In a large bowl combine all the dry ingredients and put to one side.
3. In a separate bowl, whisk together the light brown sugar and honey.  Add the mashed banana, yogurt and beaten egg and whisk until thoroughly combined.
4. Slowly pour the wet mixture into the dry ingredients and fold gently.  The mixture will be very thick but that's okay!
5. Little by little add the almond milk.  This will help to loosen the mixture slightly, but it should still be a thicker consistency than your typical cake batter.
6. Fold in the chopped chocolate and then fold in the raspberries.  This needs to be done so incredibly gently so the raspberries stay as whole as possible.  If you want pink muffins then please feel free to mix as vigorously as you wish!
10. Using 2 teaspoons, fill up your cupcake pan.  You want to fill them all the way to the top and as evenly as possible.  I baked my muffins in batches of 6, so don't worry about leaving the mixture sitting out waiting its turn, it'll be fine.
*Handy tip from Sally: when it comes to baking the last 3, or if you have any unfilled holes, fill the empty ones halfway with water to ensure even baking.  
Clever huh! 
11. Bake for 18-20 minutes or until the edges just start to turn golden and a cocktail stick comes out clear when inserted.
12. Leave to cool for 5 minutes before turning out onto a cooling rack.  Repeat steps 10 onwards if using a 6 hole pan.
Enjoy as a breakfast treat, with your mid morning coffee or whenever you fancy!
Happy baking :)


6 February 2014

Apricot Crumble Bars


I'm not sure why I have been wanting to incorporate apricots into my baking so badly over the past couple of weeks.  Perhaps it's down to the generous dollop of apricot jam I've been adding to my porridge most mornings, but either way I just had to bake something apricotty this week.

Say hello to my Apricot Crumble Bars!

The perfect accompaniment to a late afternoon's cup of tea, a comforting dessert when served straight out of the oven with a big scoop of vanilla ice cream, or equally as delicious eaten all on their own .  If you're a big fruit crumble fan like me, you will love these!


Ingredients: (makes 12)
1 cup of unsalted butter, cold and cubed
2 cups of plain flour
1/3 cup of granulated sugar
1/4 cup light brown sugar
1tsp baking powder
1tsp vanilla extract
1 egg yolk
Pinch of salt
Apricot conserve (I use St Dalfour Rhapsodie de Fruit)
Icing sugar to dust

Method:
Preheat oven to 180C (160C fan assisted) and using a little butter grease a 12 hole cupcake tray.  I prefer silicone trays as it makes removing the crumbles once baked a piece of cake - pardon the pun!

In a large bowl combine flour, sugars, baking powder and salt.

Add the butter and using fingertips, rub the butter into the dry ingredients until a crumbly dough-like consistency is formed.


Pour in the vanilla extract and the egg yolk and using a wooden spoon mix until just combined.  The dough should look like this..


Transfer 1/4 of the dough into another bowl, cover and pop in the fridge.

With the remaining dough, evenly distribute it into the tin pushing down with your fingers, making sure that the sides are a little higher.  You should have an almost jam tart base resemblance.

Add a teaspoon of apricot conserve into the middle and using the refrigerated dough, crumble over the tops.


Place on the middle shelf in the oven and bake for 30-35 minutes, until just golden on the tops.

Leave to cool completely before turning out.

Dust with a little icing sugar and you're ready to indulge in whichever way you wish!