23 March 2014

Sour Cherry Amaretti Squares


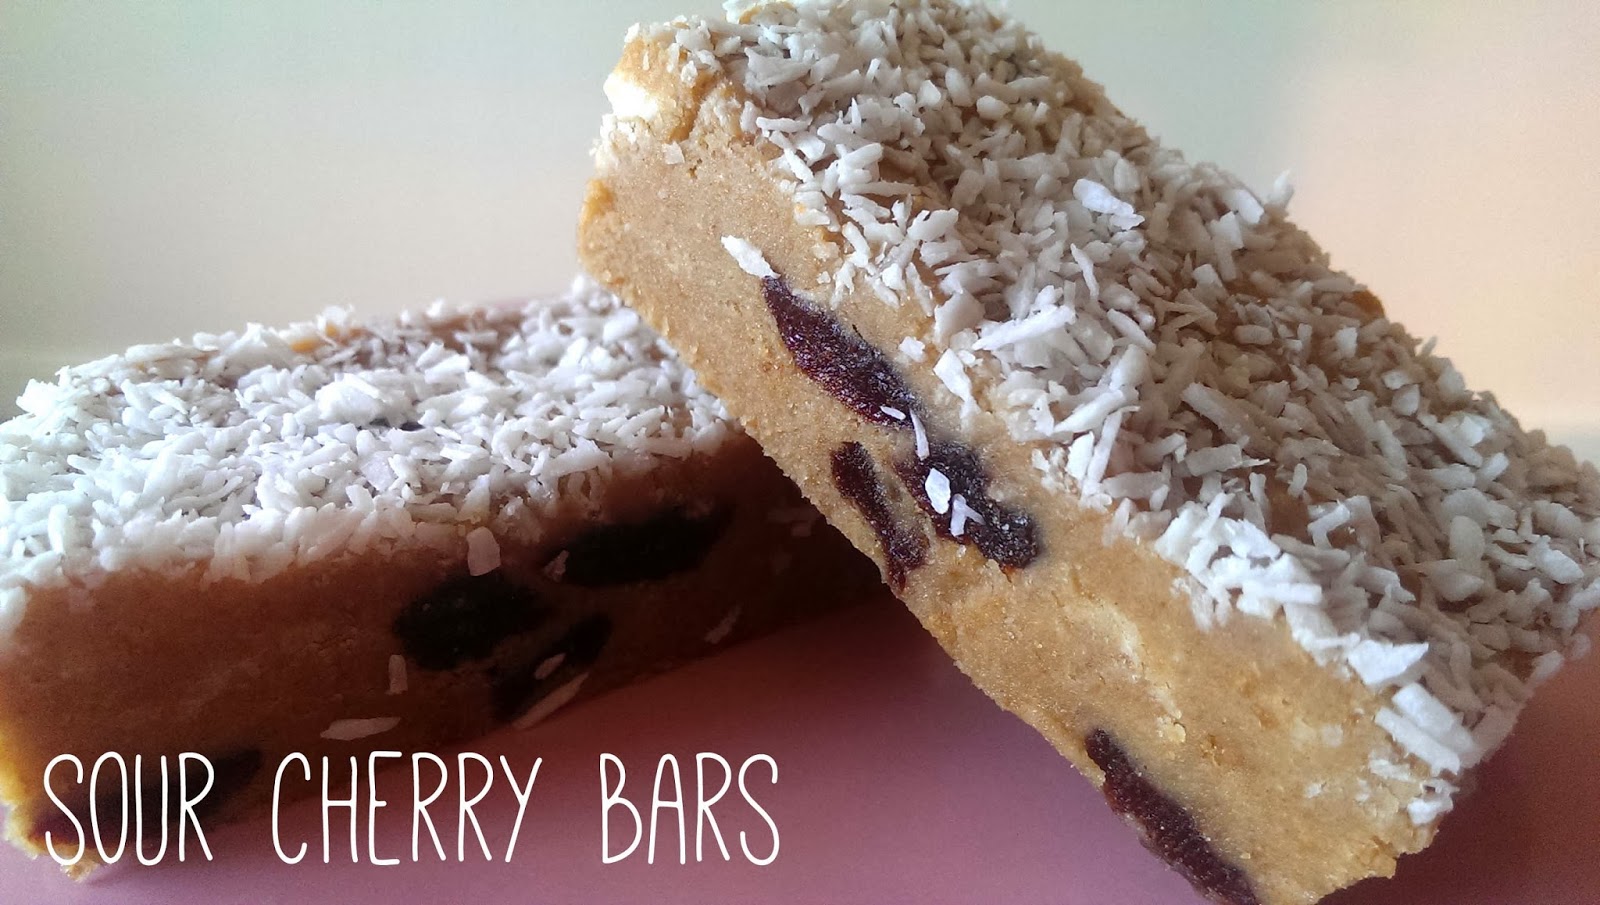
Say hello to my *new and improved* Sour Cherry Bars aka Sour Cherry Amaretti Squares - if you are a big fan of anything remotely cherry bakewell-ish then you are going to LOVE these!

Every nibble is crammed full of juicy sour cherries, white chocolate chunks and a handful of flaked almonds for good measure.  These are the perfect accompaniment to your mid-morning coffee or as a little indulgence at any time of the time of the day.


Ingredients: (makes 16 squares)

100g digestive biscuits
100g amaretti biscuits
120g sour cherries (I use Forrest Feast from Waitrose)
100g white chocolate, chopped
40g unsalted butter
90g condensed milk
handful of flaked almonds

1. Line a square 8 inch baking tin with baking parchment and put to one side.

2. Grind up the biscuits to a fine crumb in a food processor.  If you don't have a food processor just pop the biscuits into a thick resealable sandwich bag and beat with a rolling pin.

3. Add sour cherries and white chopped chocolate and mix briefly.

4. Over a medium heat, melt the butter and condensed milk for 3-4 minutes stirring continuously until combined.  Remove from heat and leave to cool slightly, you don't want it too warm otherwise it will melt the chopped chocolate.

5. Add the butter and condensed milk to the dry mix and fold in using a wooden spoon.

6. Pour into prepared tin and even out with the back of the spoon.

7. Sprinkle the flaked almonds on top and gently press down into the mix.  Refrigerate for 2 hours.

8. Once the 2 hours is up, remove from the fridge and cut up into 16 squares.

Happy (no)baking!


16 March 2014

Mocha Orange Cake


What's better than a chocolate orange cake?  A mocha orange cake of course!

Super moist, rich and chocolatey with an orangey twang and a subtle kick of espresso marks this cake pretty high up in the BakeAbella cake charts.  In fact, the amount of amazing feedback I have had regarding this cake has been utterly crazy!  Even the remains of the ganache failed to survive longer than a few hours - hey mum ;)

There are no doubts that this cake will be gracing my friends and family's mouths again rather soon.  It is honestly way too delicious to be a one off.


Ingredients

For the cake:
200g unsalted butter
25g cocoa powder
200g dark chocolate, broken into small pieces
3 tbsp instant coffee dissolved in 1 tbsp of boiling water
180g light brown muscovado sugar
180g caster sugar
3 eggs
3tbsp single cream
1 orange, zest and juice
180g self raising flour

For the ganache:
1 orange
200g dark chocolate, broken into small pieces
200ml double cream
2 tbsp instant coffee dissolved in 1 tbsp boiling water

For the buttercream:
275g icing sugar
230g unsalted butter, softened
2 orange, zest and 2 tbsp juice
1 1/2 tsp orange blossom water

For decoration:
Orange peel
45g caster sugar
1 tbsp orange juice

Making the cake:
1.  Preheat oven to 180C/160C for fan assisted ovens.  Grease and line 3 x 8 inch sandwich tins.
2. Put the butter, chocolate, cocoa and the dissolved coffee into a bowl and set over a pan of simmering water, stirring occasionally until melted.  
3. Remove from the heat and add in the sugars, mix until well combined.
4. In a separate bowl, combine the eggs, cream, orange zest and juice and then add to the chocolate mixture.
5. Fold in the flour along with a pinch of salt, then divide into the 3 tins.
6. Bake for 25-30 minutes or until firm to touch. 
7. Remove from the oven and leave to cool on a wire rack 10 minutes.  Remove from tins and peel off parchment.


Making the ganache:
1. Using a vegetable peeler, pare long ribbons of zest from the orange and leave to one side.
2. Squeeze the juice from the orange into a bowl alongside the chocolate, cream, dissolved coffee and a pinch of salt.
3. Set the bowl over a pan of water on a low-medium heat until melted, then leave to chill in the fridge for about hour or until it is thick enough to spread.

Making the buttercream:
Simply beat all the ingredient together until pale, light and fluffy!

Make the decoration:
1. Put the sugar and orange juice into a heavy-based saucepan.
2. Add the pared peel and simmer for 10-15 minutes until the peel starts to caramelise.  
3. Remove from the pan and leave to set on a sheet of baking parchment.

To assemble:
1. With a sharp knife, take off the top of each layer of sponge.
2. Add a generous amount of buttercream to the first layer and sandwich another sponge on top.  Repeat with the remaining buttercream and sponge.
3. Cover the whole cake with ganache and then decorate with the caramelised peel.
4. Pop in the fridge and leave to chill before cutting.

Please have a go at baking this, you will not be disappointed!


12 March 2014

Sour Cherry Bars


On Sunday I decided to use up some leftover ingredients and create these Sour Cherry Bars. The recipe is similar to that of my Lemon Coconut Squares, but they only have coconut on the top not in the bars themselves so they are a lot more fudge-like and dense in texture.  Don't get me wrong, they taste delicious!  They just aren't quite the flavour I was aiming for, therefore I am going to be tweaking the current recipe this week until I get it spot on.

So why am I posting?  I thought it would be nice for all you other keen bakers, or first time bakers, to see that sometimes recipes don't go to plan even for the best of us.  Creating the best bake can take many attempts, especially if you're a bit of perfectionist like I am.  Don't lose faith if things don't go right the first time round.  Remember;


Check back later on in the week to see my perfected recipe and if you haven't already, please like my Facebook page or follow me on Twitter and Instagram :)


5 March 2014

Lemon Coconut Squares

These are one of my personal favourite bakes EVER...well no-bakes actually.  These Lemon Coconut Squares require absolutely no baking.  None. They are so incredibly tasty you would not believe how super quick and easy they are to make.

With a fudge-like texture these delicious little squares are crammed full of coconut, fresh zesty lemon and some sneaky white chocolate chips.  You will be hooked after the very first bite and I wish you all the luck resisting a second (or third) helping!


All that was left after my lemon coconut square selfie!


Ingredients
Adapted from Butter Baking - makes 16 squares

100g digestive biscuits
100g ginger nut biscuits
1 cup of dessicated coconut plus extra for sprinkling
1 lemon rind, finely grated
80g white chocolate chunks
100g unsalted butter
1/2 cup sweetened condensed milk
pinch of salt

1.  Line a square 8 inch baking tin with baking parchment and put to one side.

2.  Grind up the biscuits to a fine crumb in a food processor.  If you don't have a food processor just pop the biscuits into a thick resealable sandwich bag and hit with a rolling pin.

3.  Add the dessicated coconut, lemon rind, white chocolate chunks, salt and mix.

4.  Over a medium heat, melt the butter and condensed milk for 3-4 minutes stirring continuously until combined.

5.  Leave to cool for a couple of minutes then fold into the dry mix using a wooden spoon.

6.  Pour into prepared tin and even out with the back of the spoon.

7.  Sprinkle dessicated coconut over the top and gently press down into mix and refrigerate for 2 hours.

8.  Once chilled, remove from the fridge, divide into 16 squares and enjoy!