Showing posts with label journal. Show all posts

23 August 2014

Rocky Road: BakeAbella Style!

When I was asked by a customer at the coffee shop as to whether I bake rocky road, or able to bake rocky road, it got me thinking about how I could take a basic and yet somewhat classic bake, and give it a BakeAbella twist.  Turns out it was actually a rather easy task and the super fast sell-out of these bars proved that they tasted just as good as any other.

I am a big fan of no-bake recipes and rocky road is no exception.  Zero baking, barely any preparation and you can change it up whenever you fancy using whatever left over ingredients you have lingering in your cupboard.  In fact, they're such a versatile no bake that I'm currently pondering on whether to have these available in the shop all year round and change what I put in them each month.  What do you think?

Anyway, onto the recipe!

This recipe has a little bit of a summery twist to it; we are still in August after all although some day's this week you wouldn't think it!  A dark cherry chocolate base crammed full of dried cranberries, crushed amaretti biscuits and the classic marshmallow.  Grown up rocky road has never tasted as good!


Ingredients (makes 12)
200g Lindt cherry intense dark chocolate
100g 70% (at least) dark chocolate
100g milk chocolate
150g unsalted butter
3 tbsp golden syrup
150g amaretti biscuits, crushed
125g dried cranberries
150g mini marshmallows

1. Line a square 8 inch tin with baking parchment so the edges over hang slightly, this will make the slab of rocky road easier to remove later on.

2. Break up the cherry, dark chocolate and milk chocolate into small pieces and place in a heatproof bowl with the butter and syrup.  Sit the bowl over a pan of barely simmering water and heat gently until melted.  Remove from the heat,

3. Pop the amaretti biscuits into a food bag, seal and break into pieces using a rolling pin.

4. Add 3/4 of the crushed amaretti, dried cranberries and marshmallows in the chocolate and mix well to coat.

5. Spoon into prepared tin, even out the mixture and sprinkle the remaining amaretti, cranberries and marshmallows over the top.

6. Leave to chill in the fridge for 1-2 hours until firm.  Lift out of the tin using the baking parchment and divide into bars.

Nice n' easy huh!

If you have a go at making my rocky roads, do let me know and send me your photos.  You can do this via replying in the comment box below, messaging me on my BakeAbella Facebook page, tweeting me or by sending me a direct message on Instagram.

Happy baking!


23 March 2014

Sour Cherry Amaretti Squares


Say hello to my *new and improved* Sour Cherry Bars aka Sour Cherry Amaretti Squares - if you are a big fan of anything remotely cherry bakewell-ish then you are going to LOVE these!

Every nibble is crammed full of juicy sour cherries, white chocolate chunks and a handful of flaked almonds for good measure.  These are the perfect accompaniment to your mid-morning coffee or as a little indulgence at any time of the time of the day.


Ingredients: (makes 16 squares)

100g digestive biscuits
100g amaretti biscuits
120g sour cherries (I use Forrest Feast from Waitrose)
100g white chocolate, chopped
40g unsalted butter
90g condensed milk
handful of flaked almonds

1. Line a square 8 inch baking tin with baking parchment and put to one side.

2. Grind up the biscuits to a fine crumb in a food processor.  If you don't have a food processor just pop the biscuits into a thick resealable sandwich bag and beat with a rolling pin.

3. Add sour cherries and white chopped chocolate and mix briefly.

4. Over a medium heat, melt the butter and condensed milk for 3-4 minutes stirring continuously until combined.  Remove from heat and leave to cool slightly, you don't want it too warm otherwise it will melt the chopped chocolate.

5. Add the butter and condensed milk to the dry mix and fold in using a wooden spoon.

6. Pour into prepared tin and even out with the back of the spoon.

7. Sprinkle the flaked almonds on top and gently press down into the mix.  Refrigerate for 2 hours.

8. Once the 2 hours is up, remove from the fridge and cut up into 16 squares.

Happy (no)baking!


12 March 2014

Sour Cherry Bars


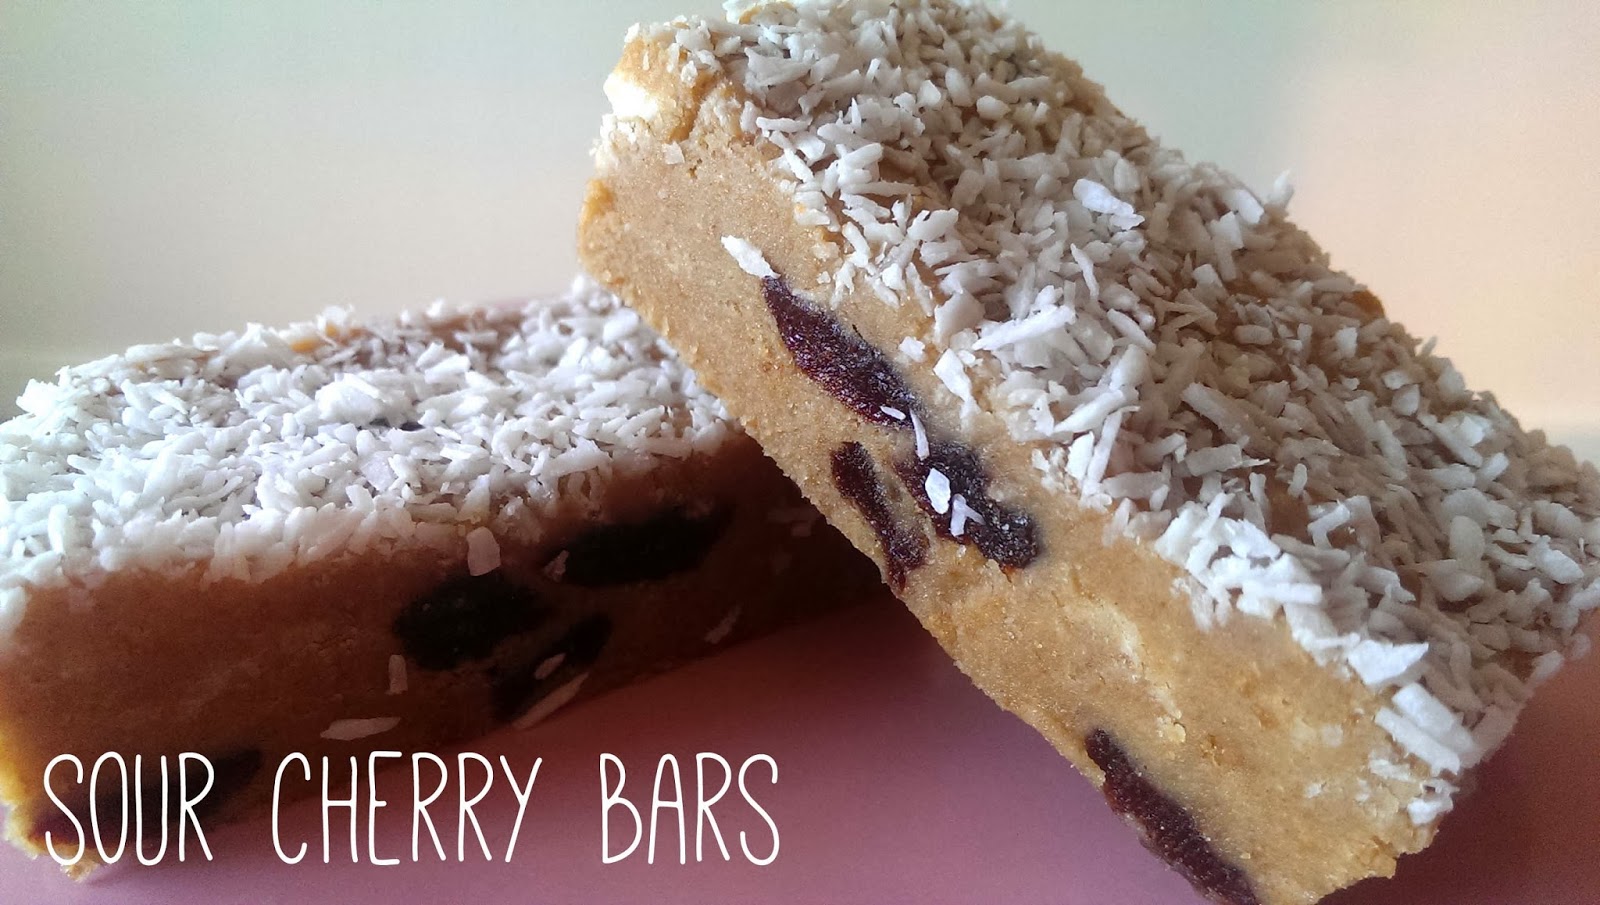
On Sunday I decided to use up some leftover ingredients and create these Sour Cherry Bars. The recipe is similar to that of my Lemon Coconut Squares, but they only have coconut on the top not in the bars themselves so they are a lot more fudge-like and dense in texture.  Don't get me wrong, they taste delicious!  They just aren't quite the flavour I was aiming for, therefore I am going to be tweaking the current recipe this week until I get it spot on.

So why am I posting?  I thought it would be nice for all you other keen bakers, or first time bakers, to see that sometimes recipes don't go to plan even for the best of us.  Creating the best bake can take many attempts, especially if you're a bit of perfectionist like I am.  Don't lose faith if things don't go right the first time round.  Remember;


Check back later on in the week to see my perfected recipe and if you haven't already, please like my Facebook page or follow me on Twitter and Instagram :)


26 February 2014

Skinny Raspberry & Chocolate Banana Muffins

Now I don't know about you, but I always find myself gazing longingly at those delicious looking blueberry-oozing muffins sitting behind the counter whilst on a coffee run at Costa.  Of course I unwillingly resist these 447 calorie, 21g fat little monsters each and every time, but the craving for moist fruit-packed bakes aren't all that easy to shake off.

I spent the last couple of days googling several "skinny" muffin recipes (there are a lot out there) and with a little bit of tweaking came up with these little beauties!

The slightly sour kick from the fresh raspberries evened out by the smooth rich dark chocolate teamed with banana makes for a flavoursome and incredibly moist muffin. Even better, these muffins only contain around 227 calories and just 4.1g of fat, so there's no need to ruin your diet or feel guilty about indulging in one of these!
Skinny Raspberry & Chocolate Banana Muffins: 
Adapted from Sally's Baking Addiction - makes 15 cupcake-size muffins

1 cup plain flour (I use Doves Farm gluten-free)
1 1/2 cup wholemeal plain flour (I use Duchy from Waitrose)
1tsp baking powder 
1/4tsp salt
1/2tsp ground cinnamon
1/4 cup honey
1/2 cup light brown sugar, loosely packed
1 cup mashed ripe banana (equal to 2 large bananas)
1/4 cup non-fat greek vanilla yogurt
1 large egg, beaten
3/4 cup almond milk
1/2 cup 90% dark chocolate, roughly chopped
1 cup fresh raspberries
1. Preheat oven to 160C and lightly grease a silicone cupcake pan.  Silicone works best.  Do not use cases as the muffins will stick.

2. In a large bowl combine all the dry ingredients and put to one side.
3. In a separate bowl, whisk together the light brown sugar and honey.  Add the mashed banana, yogurt and beaten egg and whisk until thoroughly combined.
4. Slowly pour the wet mixture into the dry ingredients and fold gently.  The mixture will be very thick but that's okay!
5. Little by little add the almond milk.  This will help to loosen the mixture slightly, but it should still be a thicker consistency than your typical cake batter.
6. Fold in the chopped chocolate and then fold in the raspberries.  This needs to be done so incredibly gently so the raspberries stay as whole as possible.  If you want pink muffins then please feel free to mix as vigorously as you wish!
10. Using 2 teaspoons, fill up your cupcake pan.  You want to fill them all the way to the top and as evenly as possible.  I baked my muffins in batches of 6, so don't worry about leaving the mixture sitting out waiting its turn, it'll be fine.
*Handy tip from Sally: when it comes to baking the last 3, or if you have any unfilled holes, fill the empty ones halfway with water to ensure even baking.  
Clever huh! 
11. Bake for 18-20 minutes or until the edges just start to turn golden and a cocktail stick comes out clear when inserted.
12. Leave to cool for 5 minutes before turning out onto a cooling rack.  Repeat steps 10 onwards if using a 6 hole pan.
Enjoy as a breakfast treat, with your mid morning coffee or whenever you fancy!
Happy baking :)


3 February 2014

The First Post!


Hello and welcome to my brand new baking blog!  For those of you who are regular bloggers you may just recognise my chubby-cheeked face as I used to occasionally ponder my thoughts in a lifestyle and beauty blog called Between Today & Tomorrow.  For those of you who have no idea who I am...

Hi. I'm Abby and I love to bake!

BakeAbella is my online baking journal and my New Year's Resolution if you will.  Having stopped baking professionally almost two years ago, it became evident that it was a big part of who I am and that I'd developed a rather big cupcake-shaped hole in my life.

In January I made a promise to myself - I would bake at least once a week.

Everything I bake from now on will be featured on this little blog with photos, recipes and how-to's.  Many friends and work colleagues often pester me for my recipes, so if you too are a keen baker or just fancy trying out one my creations, now you can!

If you want to find out a bit more about me, or where my love for baking came from, just head over to my About Me page.

I am currently seeking inspiration for my next bake on Thursday and at this moment I'm thinking apricots...