Showing posts with label blog. Show all posts

23 August 2014

Rocky Road: BakeAbella Style!

When I was asked by a customer at the coffee shop as to whether I bake rocky road, or able to bake rocky road, it got me thinking about how I could take a basic and yet somewhat classic bake, and give it a BakeAbella twist.  Turns out it was actually a rather easy task and the super fast sell-out of these bars proved that they tasted just as good as any other.

I am a big fan of no-bake recipes and rocky road is no exception.  Zero baking, barely any preparation and you can change it up whenever you fancy using whatever left over ingredients you have lingering in your cupboard.  In fact, they're such a versatile no bake that I'm currently pondering on whether to have these available in the shop all year round and change what I put in them each month.  What do you think?

Anyway, onto the recipe!

This recipe has a little bit of a summery twist to it; we are still in August after all although some day's this week you wouldn't think it!  A dark cherry chocolate base crammed full of dried cranberries, crushed amaretti biscuits and the classic marshmallow.  Grown up rocky road has never tasted as good!


Ingredients (makes 12)
200g Lindt cherry intense dark chocolate
100g 70% (at least) dark chocolate
100g milk chocolate
150g unsalted butter
3 tbsp golden syrup
150g amaretti biscuits, crushed
125g dried cranberries
150g mini marshmallows

1. Line a square 8 inch tin with baking parchment so the edges over hang slightly, this will make the slab of rocky road easier to remove later on.

2. Break up the cherry, dark chocolate and milk chocolate into small pieces and place in a heatproof bowl with the butter and syrup.  Sit the bowl over a pan of barely simmering water and heat gently until melted.  Remove from the heat,

3. Pop the amaretti biscuits into a food bag, seal and break into pieces using a rolling pin.

4. Add 3/4 of the crushed amaretti, dried cranberries and marshmallows in the chocolate and mix well to coat.

5. Spoon into prepared tin, even out the mixture and sprinkle the remaining amaretti, cranberries and marshmallows over the top.

6. Leave to chill in the fridge for 1-2 hours until firm.  Lift out of the tin using the baking parchment and divide into bars.

Nice n' easy huh!

If you have a go at making my rocky roads, do let me know and send me your photos.  You can do this via replying in the comment box below, messaging me on my BakeAbella Facebook page, tweeting me or by sending me a direct message on Instagram.

Happy baking!


10 August 2014

Beer, Bacon & Potato Chip Cookie Bars


Beer, Bacon & Potato Chip Cookie Bars...sounds slightly bizarre right?  Well you would be completely and utterly wrong!

These cookie bars are crammed full of all things sweet and salty and went down a treat at the coffee shop this week, in fact a tray of these lasted just 3 days!

If you are a fan of sweet n' salty popcorn, salted chocolate, or even those rather addictive Reese's Peanut Butter Cups, you are going to fall absolutely head over heels for these wedges of mourish-deliciousness!

I found this recipe on Lindsay's blog over at lovelifeandsugar.com and could not resist giving them a try.  Of course this is an American recipe as you could no doubt guess from their name, therefore if you are on a diet I would skip this post all together - these are rather high in calories, but the perfect treat after a hectic morning or busy afternoon.

So what is actually in these bars?

Bacon
Beer
Ready Salted Crisps
Salted Pretzel Pieces
Caramel
Chocolate Chips
Peanut Butter Chips

Intrigued?  I bet you are!


Ingredients (makes 12-16)
Cookie:
170g unsalted butter at room temperature
150g dark brown sugar
56g caster sugar
1 egg
2 tsp vanilla extract
250g plain flour
1 tsp baking powder
130g dark chocolate chunks/chips
2 rashers of bacon, cooked and chopped
2 tbsp beer

Topping:
27 caramels
60ml beer
1 small packet of ready salted crisps
Handful of salted pretzels broken into pieces
2 rashers of bacon
75g dark chocolate chunks/chips
75g peanut butter chips (can be found in American food shops or on Amazon)

Chocolate Drizzle:
40g dark chocolate, melted

1.  Preheat oven to 170 C and line a brownie tray with baking parchment so the edges over hang slightly.  This will make the cookie slab easier to remove later.

2.  Cream together the butter and sugars until light in colour, around 3-4 minutes.

3.  Add the egg, vanilla and mix well.

4.  Add the flour and baking powder gradually, then stir in chocolate chunks, chopped cooked bacon and beer.  Dough will be slightly thick and sticky.

5.  Spoon the cookie dough evenly into the tin and bake for 20-25 minutes until the edges are slightly golden.  Do not over bake!  The centre may still seem soft but don't panic, this is okay.

6.  Whilst the cookie is cooling, melt the caramels and beer together in a pan over a medium heat.  Allow it to cook for 5-10 minutes until it begins to thicken in consistency.

7.  Pour the caramel over the top of the cookie slab and spread evenly.

8.  Sprinkle the broken up crisps, pretzels, bacon pieces, chocolate chips and peanut butter chips over the caramel before it cools and hardens.

9.  Pop the dark chocolate into a microwaveable bowl and microwave until melted.  Drizzle over the toppings using a piping bag, or a teaspoon.

10.  Transfer to the fridge and allow to set for 1-2 hours.  You don't want the caramel to be rock hard, it should be slightly gooey when cut.

11.  Remove from the fridge and lift out of the tin using the overhang of baking parchment.  Divide into as many bars or doorstops as you wish ;)  (I find running the knife under hot water makes for a cleaner cut)

If you have a go at making these bars do let me know and send me your photos.  You can do this via replying in the comment box below, messaging me on my BakeAbella Facebook page, tweeting me or by sending me a direct message on Instagram.

Happy baking!


12 March 2014

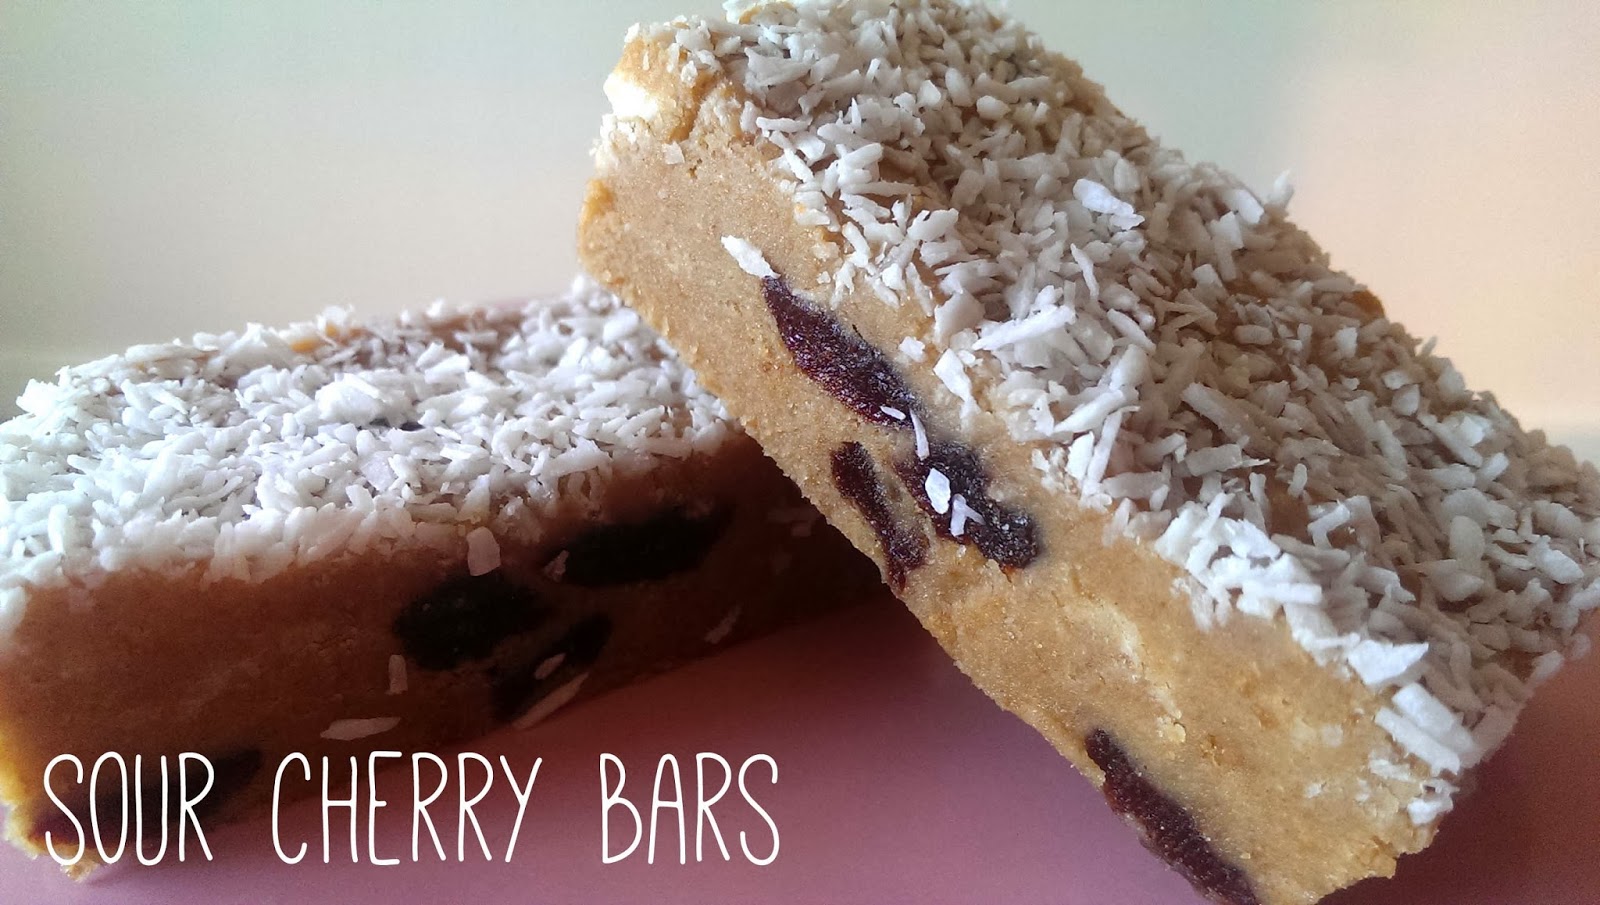
Sour Cherry Bars


On Sunday I decided to use up some leftover ingredients and create these Sour Cherry Bars. The recipe is similar to that of my Lemon Coconut Squares, but they only have coconut on the top not in the bars themselves so they are a lot more fudge-like and dense in texture.  Don't get me wrong, they taste delicious!  They just aren't quite the flavour I was aiming for, therefore I am going to be tweaking the current recipe this week until I get it spot on.

So why am I posting?  I thought it would be nice for all you other keen bakers, or first time bakers, to see that sometimes recipes don't go to plan even for the best of us.  Creating the best bake can take many attempts, especially if you're a bit of perfectionist like I am.  Don't lose faith if things don't go right the first time round.  Remember;


Check back later on in the week to see my perfected recipe and if you haven't already, please like my Facebook page or follow me on Twitter and Instagram :)


5 March 2014

Lemon Coconut Squares

These are one of my personal favourite bakes EVER...well no-bakes actually.  These Lemon Coconut Squares require absolutely no baking.  None. They are so incredibly tasty you would not believe how super quick and easy they are to make.

With a fudge-like texture these delicious little squares are crammed full of coconut, fresh zesty lemon and some sneaky white chocolate chips.  You will be hooked after the very first bite and I wish you all the luck resisting a second (or third) helping!


All that was left after my lemon coconut square selfie!


Ingredients
Adapted from Butter Baking - makes 16 squares

100g digestive biscuits
100g ginger nut biscuits
1 cup of dessicated coconut plus extra for sprinkling
1 lemon rind, finely grated
80g white chocolate chunks
100g unsalted butter
1/2 cup sweetened condensed milk
pinch of salt

1.  Line a square 8 inch baking tin with baking parchment and put to one side.

2.  Grind up the biscuits to a fine crumb in a food processor.  If you don't have a food processor just pop the biscuits into a thick resealable sandwich bag and hit with a rolling pin.

3.  Add the dessicated coconut, lemon rind, white chocolate chunks, salt and mix.

4.  Over a medium heat, melt the butter and condensed milk for 3-4 minutes stirring continuously until combined.

5.  Leave to cool for a couple of minutes then fold into the dry mix using a wooden spoon.

6.  Pour into prepared tin and even out with the back of the spoon.

7.  Sprinkle dessicated coconut over the top and gently press down into mix and refrigerate for 2 hours.

8.  Once chilled, remove from the fridge, divide into 16 squares and enjoy!


3 February 2014

The First Post!


Hello and welcome to my brand new baking blog!  For those of you who are regular bloggers you may just recognise my chubby-cheeked face as I used to occasionally ponder my thoughts in a lifestyle and beauty blog called Between Today & Tomorrow.  For those of you who have no idea who I am...

Hi. I'm Abby and I love to bake!

BakeAbella is my online baking journal and my New Year's Resolution if you will.  Having stopped baking professionally almost two years ago, it became evident that it was a big part of who I am and that I'd developed a rather big cupcake-shaped hole in my life.

In January I made a promise to myself - I would bake at least once a week.

Everything I bake from now on will be featured on this little blog with photos, recipes and how-to's.  Many friends and work colleagues often pester me for my recipes, so if you too are a keen baker or just fancy trying out one my creations, now you can!

If you want to find out a bit more about me, or where my love for baking came from, just head over to my About Me page.

I am currently seeking inspiration for my next bake on Thursday and at this moment I'm thinking apricots...